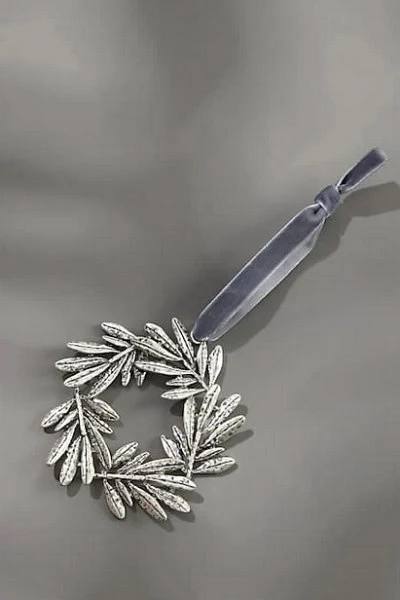
Each year around this time I like to think of something Christmassy to make and share as a tutorial. This past weekend inspiration struck when I spotted a silvertone tree ornament at a J.Jill store... it seemed like it could be a quillable design.

I'm calling the result an abstract wreath brooch. In all honesty, under my breath I'm referring to it as my wacky wreath because it didn't turn out quite the way I'd envisioned, but still, it's festive... I may never officially pin it on my jacket, but it will be a fine tree ornament.

Despite trying a million different ways to photograph it in our gray weather, the shine of the golden metallic edge strips just isn't captured... it's too bad because it's really quite brilliant in person. My phone did throw me a bone as it asked if I
wanted it to identify a plant in my pics. So at least it recognized the design as greenery... how about that!

J.Jill ornament
I'd love to see yours if you decide to give this little project a go:
Supplies:
Quilling strips - Quilled Creations gold edge ivory and gold edge red, 1/8" (3mm)
Quilling tool - needle or slotted
(The pictured turquoise fine-tip slotted tool that I use is available from @maggiequilling in Japan on Instagram - contact her via DM for cost and shipping information. Yes, she speaks English.)
Ruler
Detail scissors
Glue - I like this Scotch clear gel adhesive
Fine tip tweezers - for ease in handling coils
Paper piercing tool, ball head pin or cocktail pick - to apply glue
Non-stick work board - examples: wax paper, acrylic sheet, Styrofoam tray
Plastic lid - to use as a glue palette
Damp cloth - to keep fingers glue-free
Pin back bar or ornament cord
Gluing tip: Use the smallest possible amount; no glue should show
on your finished project. I like to put a small dollop on a plastic lid
and dip from
it with the tip of a paper piercing tool, glass head pin, or cocktail pick as this
helps to control the amount. A fine-tip plastic glue bottle is popular
with many quillers too.
Instructions: (finished wreath measures approximately 2 1/2 inches in diameter)
Make 5 gold edge ivory wheat ear greenery fronds:
1. Make 8 quilled wheat ears for each frond:
1 with 2
loops
3 with 3
loops
4 with 4 loops
To make a wheat ear frond:
a. Begin by making a 1/8 inch fold at
one end of a strip.
b. Loop the strip completely around the fold. Apply a dot of glue at the bottom to anchor the strip in place.
c. Continue to loop the paper, spacing the loops evenly. It isn't necessary to glue each one. Each loop should be slightly taller than the previous one. Gently shape them between your fingers as you go to form a column.
d. Glue the strip at the bottom of the column and trim the excess strip.
e. Stack and glue two 5-inch
strips one on top of the other. If excess
glue seeps out along the edges, wipe the paper gently with a damp cloth while the glue is wet. Allow the glue to dry and cut the strip into five 1-inch lengths, curving them slightly between your thumb and index finger.
f. Arrange and glue each one of the eight wheat ear sets around a 1-inch double strip, leaving about a 1/2-inch stem. Pinch and angle some of the tips as desired.
g. Glue the fronds in a circle by overlapping the wheat ear tips onto the base of the next frond.
2. Make a gold edge red bow:
a. Stack and glue two
strips one on top of the other. Allow this double strip to dry completely before curving the strip into a bow loop (or buckling may occur).
b. Make a domed oval tight coil: Roll a 3-inch tight coil. Press against one side with the ball of a ball head pin to create a dome. Pinch it gently with fingers or tweezers to create an oval. Apply a bit of glue inside the dome to preserve the curve.
c. Make two small loops (1 1/4-inch strips) and two larger ones (1 3/8-inch strips) with the double thickness strip.
d. Make two 4-loop wheat ears.
e. Assemble the bow.
3. Make 15 gold edge red berries:
a. Cut a 15-inch strip into 1-inch lengths and then cut each one in half lengthwise.
b. Roll each strip into a tight coil and dome it as you did for the bow's coil.
c. Glue into groups of three.
d. Glue one group on the stem end of each frond.
4. Glue the bow on the wreath.
5. Glue a pin bar on the wreath back or string an ornament cord through the topmost frond loop.
TA-DAH! - Enjoy!
Gold Edging Tip: If you don't have access to metallic-edge quilling paper, plain strips can be edged with a
Krylon leafing pen. Another
option is to press the completed components against
a metallic ink pad, such as
Galaxy Gold by Brilliance.
You might also enjoy
this post that shows more projects I made recently with Quilled Creations Metallic Edge Strips
All Things Paper is an Amazon and Etsy affiliate.
If you should make a purchase using an affiliate link,
a small
commission will be earned at no additional cost to you.
Thank you for helping to defray the rising costs of maintaining this site and newsletter.


