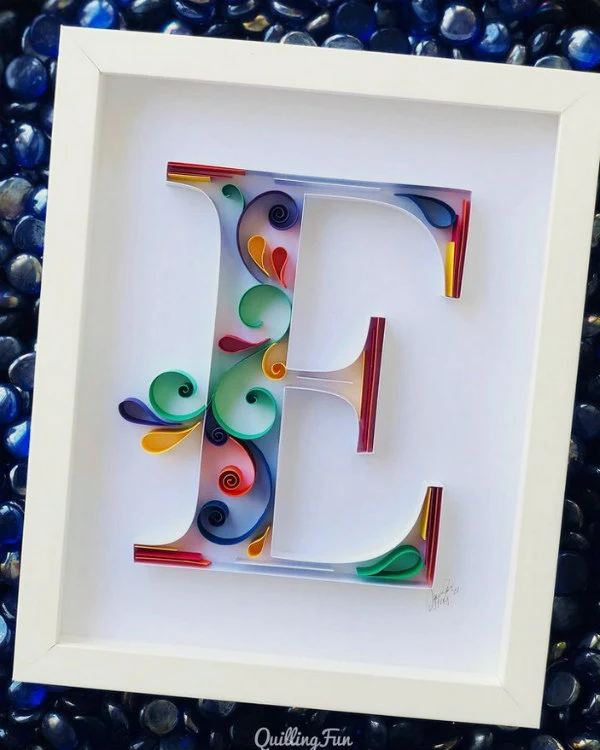
Jennifer Stacey of Quilling Fun constantly surprises me... not only is she a prolific quiller of commissioned custom designs, but she recognized early on that embracing digital technology would speed up her ability to produce such varied work without sacrificing quality or the handmade aspect of quilling.
Jennifer incorporates requested details into each themed piece to make it personalized and meaningful. A wedding, anniversary, new baby, birthday, hobby, profession, special location - actually any aspect of a client's life - and she is up to the challenge.
For example, this first anniversary
gift (traditionally made of paper) commemorated the wedding of a couple who met in
Maui. There were married near the Astoria-Megler Bridge in Oregon, so Jennifer combined those two significant
places into a Maui-shaped piece.
Let's get to know Jennifer Stacey:
Where did you first come across quilling?
I found quilling back in 2012 while looking for an anniversary gift to make for my husband. I discovered Yulia Brodskaya's amazing paper art and was fascinated!
Tell us about your favorite quilling tools and papers.
Tools - Maggie’s fine slotted tool, a needle tool, a paper bead roller for wider strips, and Aleene's Tacky Glue. Also, three Cricut machines that cut strips and score my designs.
Papers - Recollections cardstock 65lb (Amazon) and 24lb (Michaels) weight that I cut with my Cricut.
When and how did you begin incorporating an electronic cutter into your designs?
After making nine custom letters for my first client order and using straight pins in a Styrofoam board to create them, I said there has to be an easier way. I saw the Cricut cutting machine online and thought it would be cool to score the outline of the letters on paper! Ever since then, I do that and it’s sped up the process so much.
I also use either Cricut Design
Space or the Procreate app to design the basic idea. From there I
usually sit down once to paint/color the background and then the next
time add the quilling directly onto the background.
How on earth do you get so much done? Just the back and forth emails/phone calls with a client to plan a custom project take a ton of time, not to mention packing and shipping, yet you post new work frequently. You even manage to run the active Contemporary Quilling Facebook group.
How do I create and produce so fast? The Cricut has sped up the prep
time. For the designs themselves, I envision how I want them to
look in my head and prep the pieces by outlining or painting/coloring. I
use basic images from Cricut Design Space or I ask permission
from photographers to use their images as a reference.
Once I do that, I usually do the quilling in one or two sittings. From doing so many pieces, I have learned exactly how long the strips need to be without having to measure. I have also experimented so much that I know what will work to get my vision from my head to paper.
I don’t have much
free time, but I do have more now that my kids are grown. Due to working five days a week as a lead preschool teacher and managing the Facebook page, I usually quill early in the mornings or in the evenings.
Jennifer also makes ornaments to stock in her Etsy shop. This pretty starfish is especially apropos because she lives in Florida.
Follow along with Jennifer on Instagram where she is @jstacey_quillingfun or on Facebook, read her blog, and visit her shop, Quilling Fun.


