DIY: Quick and Easy All Occasion Quilled Card
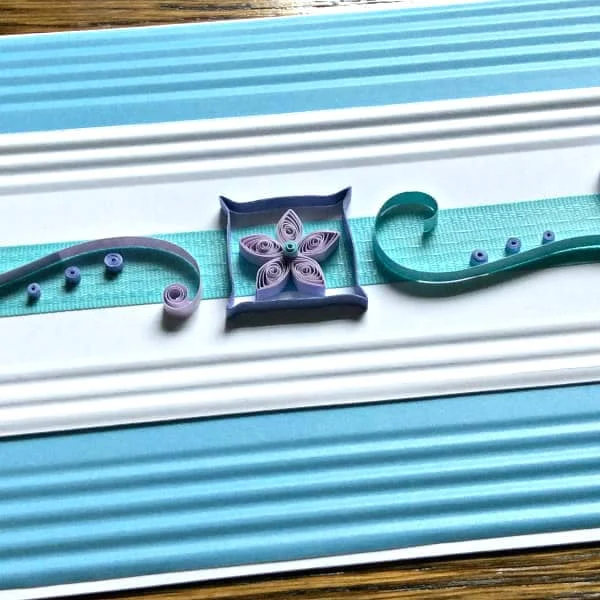
Here's an idea for a simple quilled card to express birthday wishes, thanks, sympathy, or to just say hello. It has a definite summertime vibe thanks to icy blue vellum that's crimped to conjure up thoughts of cool water, along with pastel quilling.
Card: Decide on a size to suit your needs. My tent-fold card measures 7 x 4 inches, which gives enough room to write a note inside. I like to use a portable 12-inch Fiskar's Trimmer for card making.
1. Run a small sheet of vellum - about 3 x 7 inches - through a paper crimper and cut it in half across the width. My crimper model is not available, but this wavy one would be an even better way to carry out the water theme.
2. Use a glue stick to adhere one crimped strip across the top of the card and one across the bottom. I find that glue stick marks are less likely to show through translucent vellum than other types of glue or double-stick tape. Using a light touch helps too.
3. Cut a 3 x 7-inch strip of the same white card stock as for the card and add a few crimps to the top and bottom edges. Glue this layer across the center of the card.
4. I found a piece of silky aqua seam binding in my stash and glued it across the center of the white card to add a bit of interest under the quilling.
5. Trim any excess card, vellum, and seam binding along card edges.
Quilling:
1. Roll a strip of quilling paper three times around a dowel (I used my glue stick as a makeshift dowel), and glue the end in place to make a ring coil. Slide it off the dowel and gently pinch at opposite points. Give it a quarter turn and pinch again to make a square. Squeeze the square inwardly at opposite points to curve the straight sides a bit, pinching the corners to give even more shape.
2. Roll five 5-inch marquise coils and glue them together to create a flower.
3. Roll a 2-inch tight coil and glue it in place as the flower center.
4. Glue the square frame to the center of the seam binding and glue the flower inside it.
5. Make 6 scrolls: use 3 to 4-inch strips to make two S-scrolls that are coiled at each end and four 1.5 to 2-inch scrolls with just one end coiled. As you can see, the left and right side scrolls don't match exactly... just glue the scrolls together to create groupings that you find pleasing to the eye. Glue one grouping on each side of the center square.
6. Make 2 each: 1-inch, 1.5-inch, 2-inch tight coils and glue them along the scroll sections as shown.
7. Make two 3-inch teardrops and glue one at the far end of each scroll section.
A blurry shot, but the sun was on its way down on this summer evening. I wish I'd been able to capture the sun as it was a vivid red - beautiful, but sad at the same time as the color was due to smoke from fires that are burning all the way on the other side of the country and in Canada.
If you are new to quilling, there are loads of YouTube videos and books to get you started. You also might want to look at my answers to Frequently Asked Quilling Questions and my Basic Tutorials. For more summertime quilled card ideas, have a look here, here, and here.
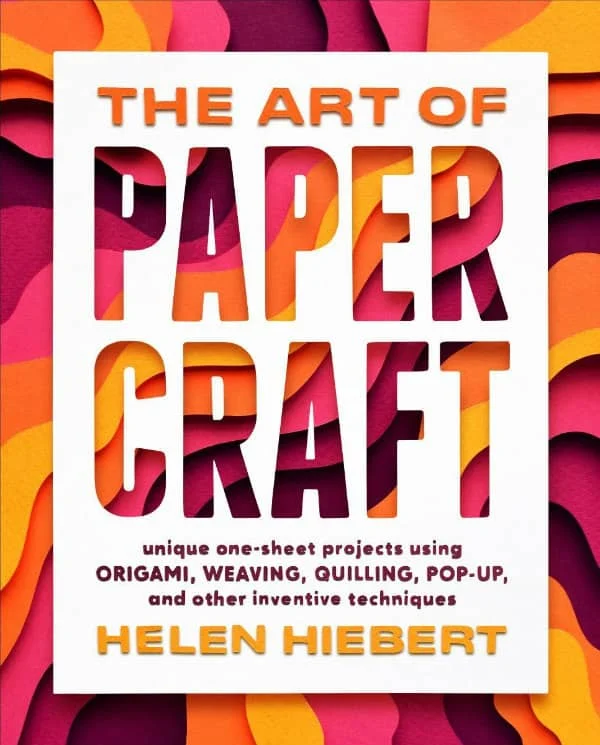
Helen's Hiebert's newest book The Art of Papercraft will be released in February and is available for pre-order. Having had a chance to preview it, I can say without reservation (and not just because I contributed a project) that it is an amazing book (320 pages - wow!) filled with enticing ideas.
The eye-catching cover was created by Owen Gildersleeve who will be an upcoming guest on Helen's podcast, Paper Talk... I never miss an episode.
Congratulations to Beth Reece, whose website Quillerie.b is now live!
I'll be taking a little break from publishing new blog posts in August, but the newsletter will continue to go out on schedule to subscribers. You can read the latest issue here and sign up for future editions here. It will arrive in your inbox once every three weeks and you may unsubscribe at any time.


