How to Make an Attention-Grabbing Quilled Necklace
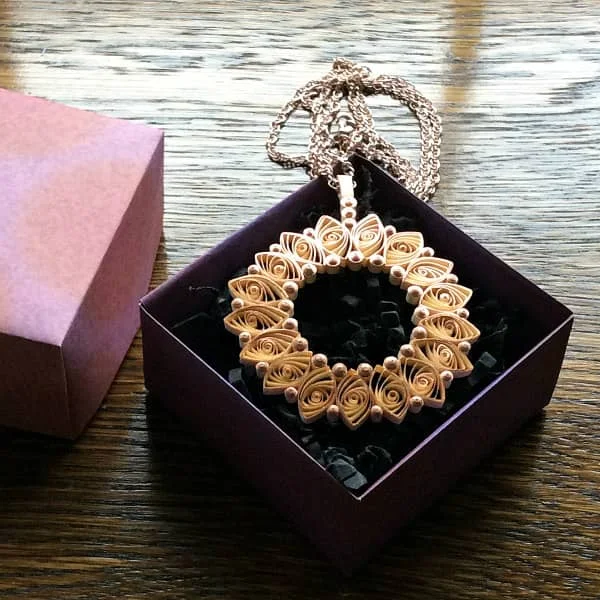
Love the idea of paper jewelry that is incredibly lightweight to wear and so pretty it attracts the attention of strangers? Here's a tutorial for a quilled necklace pendant that's bound to receive compliments... at least that's what happens when I wear jewelry that I've made with metallic-edge quilling strips. Seriously, the paper gets most of the credit as the shine truly looks like gold, silver, or copper!
But before you recoil in horror thinking this design is wayyy too complicated to make, let me assure you that it requires only two types of quilled coils - the marquise and domed tight coil. I'll walk you through the process one step at a time.
A note about quilling strips and tools:
I used metallic-edged strips from from JJ Quilling Design in England. [edit: As of 2022, the company has been sold, but Quilled Creations makes a fine alternative.] A package is surprisingly inexpensive even though the look is rich and oh-so-shiny.
(make the origami paper gift box via The Paper Assembly's free tutorial)
Note: This post contains Etsy and Amazon affiliate links.
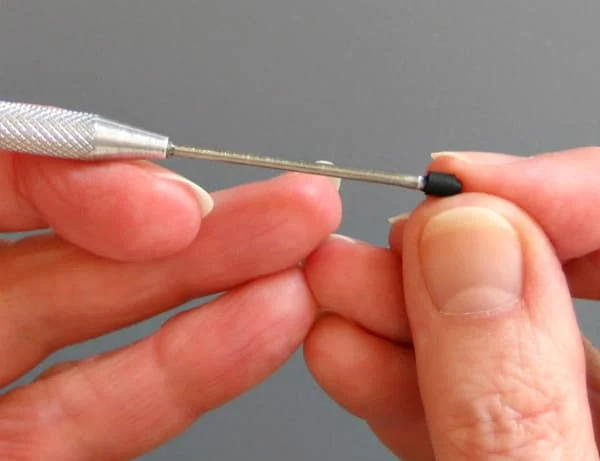
I used my favorite precision slotted tool (the small bright blue tool in the photo below) from Etsy shop Quilling Maggie in Japan. [Maggie may temporarily not be shipping due to Covid restrictions.] A standard slotted tool, available in craft stores and from any online supplier, costs just a few dollars and can be substituted. The center crimp that a standard tool produces will be larger than the crimp that results with Maggie's tool, but this isn't a deal breaker. Some quillers also like the Quilled Creations Savvy Slotted Tool.
Supplies:
Quilling strips - silver-edged ivory (1/8 inch, 3mm) or cut your own light to medium weight paper in any color using a craft knife, metal-edged ruler, and cutting mat. One package of Quilled Creations Gilded Edge Strips will be enough to make at least two pendants.
Metallic (pearlized) silver quilling strip - to cover the bale (1/8 inch, 3mm) - available from most quilling suppliers
Quilling tool
Glue - I like Scotch Clear Glue or Elmer's Clear Glue; white craft glue is favored by many quillers too
Ruler
Ball head pin or T-pin - to shape domed tight coils and apply glue
Non-stick surface - use as glue palette and work board. Examples: plastic lid, acrylic sheet, waxed paper, Styrofoam tray
Damp cloth - to keep fingers glue-free
Necklace chain
Optional:
Paper piercing tool - so useful for applying glue, arranging coils
Fine tip glue bottle - available from most suppliers and preferred by many quillers. My gluing method of choice is to put a small puddle of glue on a plastic lid and dip from it with the tip of a pin or paper piercing tool. Both this method and a fine tip glue bottle help to limit the amount of glue that is used... less is more when it comes to quilling!
quilled coils used to make the pendant shown with the bale strip
Instructions:
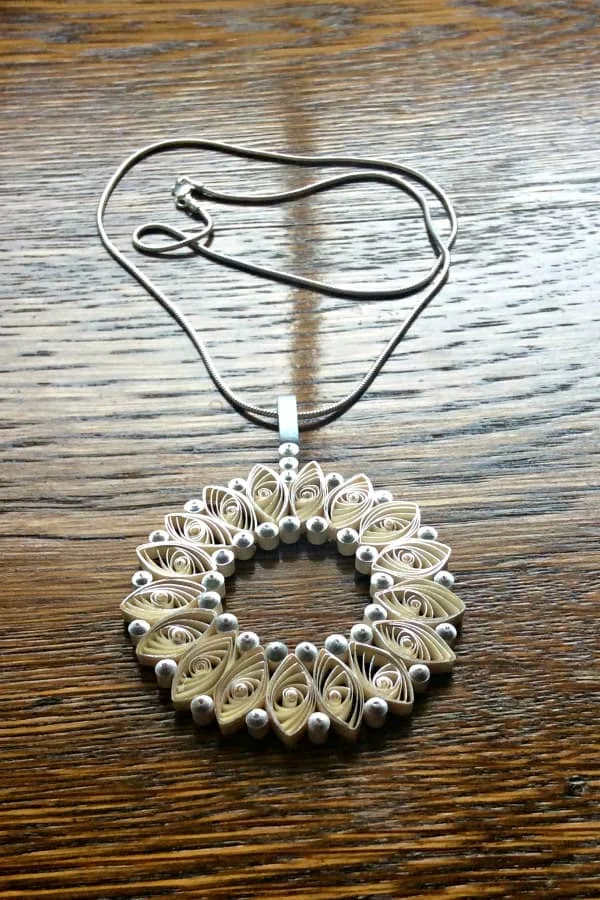
The diameter of the finished pendant is 2 inches (5cm).
You'll notice that two colors of quilling paper are used in these photos - black with gold edge and ivory with silver edge. Grey days have been endless lately so I took as few new pics as possible to spare you from blurriness. The black paper images are borrowed from my Quilled Gilded Drop Earrings Pattern - perhaps you'll want to make them too.
1. Make 17 six-inch (15.2cm) marquises.
To make a marquise coil:
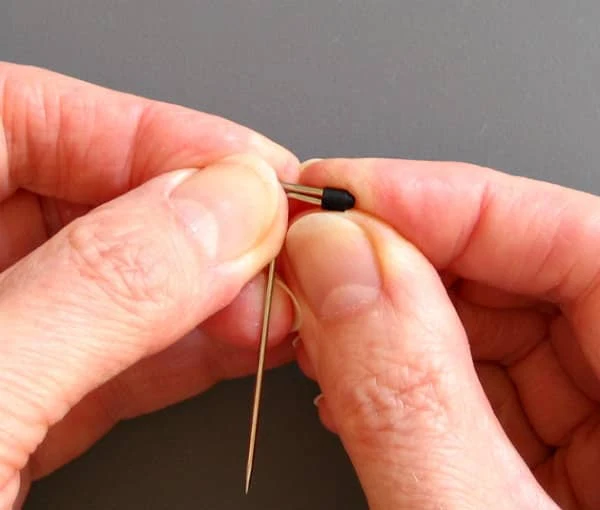
a. Slide the far end of a strip into the tool slot. Roll the strip by turning the tool evenly. When the strip end is reached, allow the paper to relax.
b. Slip this loose coil off the tool and compress it gently between your thumb and index finger.
Note: It may help to use a ball head pin to evenly space the inner coils before the next step.
c. Pinch a sharp point at each end to create a marquise (eye) shape. Glue the strip end at the closest point and trim excess.
d. Compress the points gently between your thumb and index finger. When the coil is released, the inner coils will rotate a bit to create a modified vortex coil.
(Curious about the real thing? Make a vortex coil.)
2. Make 17 3-inch (7.6cm) domed tight coils and make 16 2.5-inch (6.4cm) domed tight coils.
Note: Tear one end of each tight coil strip. (A torn end blends better than a blunt cut when glued, resulting in a perfectly round tight coil.)
To make a domed tight coil:
a. Roll the strip on a slotted tool. Glue the torn end without allowing the strip to loosen. Slide the coil off the tool.
b. Press against one flat side of the coil with a T-pin or ball head pin to create a dome on the opposite side.
c. Apply a tiny amount of glue inside the dome with a pin or paper piercing tool to preserve the curve.
3. Make a domed tight coil trio as the bale attachment:
a. Make 1 two-inch (5cm) domed tight coil, 1 two-1/2-inch (6.4cm) domed tight coil, and 1 three-inch (7.6cm) domed tight coil.
b. Stack the three coils smallest to largest in size and glue them together in a row.
4. Make the bale:
a. Glue 2 three-inch (7.6cm) strips together to create a double thickness strip. Allow glue to dry.
Note: Place strips before gluing so that a silver edge will show on each side of the double strip.
b. Make a fold one half-inch from the strip end. Continuing folding the strip around itself two more times to create a three layer bale. Trim excess strip at the closest folded end and glue it in place.
c. Glue a strip of metallic (pearlized) silver quilling strip once around the bale so that it matches the silver shine of the pendant.
5. Assemble components:
a. Glue the marquises in a circle. For the neatest look, place the glued end of each marquise so it will be hidden by the inner circle domed tight coils. Have patience... depending on the glue you are using, your circle might spring apart in a place or two.
Quick dry glue is an option, but I prefer having a chance to adjust the coil placement before my clear gel has fully set. If you need to pull two coils apart to reposition, do it gently and then smooth the paper with a damp cloth. Let it dry for a minute or two and reglue.
b. Glue a three-inch (7.6cm) domed tight coil between the marquises inside the circle and glue a two1/2-inch (6.4cm) domed tight coil between the marquises around the outside perimeter.
c. Glue the domed tight coil trio in the remaining opening of the outside perimeter with the smallest tight coil closest to the marquises.
d. Glue the bale to the top of the trio.
6. Finishing touches:
a. Turn the pendant over and apply
reinforcing dots of glue to all join spots, paying extra attention to where the trio and bale are attached as these joins will receive the most stress.
Note the small amount of glue on pin tip
b. Allow the glue to harden completely before sliding the necklace chain through the bale.
c. Wear and enjoy!
Tips:
No one was ever a fabulous quiller right away... like anything, it takes practice to make coils that are evenly sized. Hang in there - it will come!
I usually don't apply a fixative to seal quilled pendants and earrings as
they don't receive a lot of hard use, but if you live in an area with high humidity you might want to apply a waterproof spray or brush-on fixative to the back of the jewelry. Warning: I have found that fixatives will dull the bright shine of metallic edge quilling strips, thus I only apply them to the reverse side.
In lieu of ordering gilded-edge paper, add your own metallic
shine with a
Krylon leafing pen or metallic gel pen to plain quilling strips. You might also press a
silver, gold, or copper ink pad against rolled coils for a
subtle gilded effect.
You'll find twenty more quilled jewelry patterns in my book The Art of Quilling Paper Jewelry. Click on Most Recent Reviews at the link to learn more about it.


