Bookbinding DIY: Ribbon Bound Pages
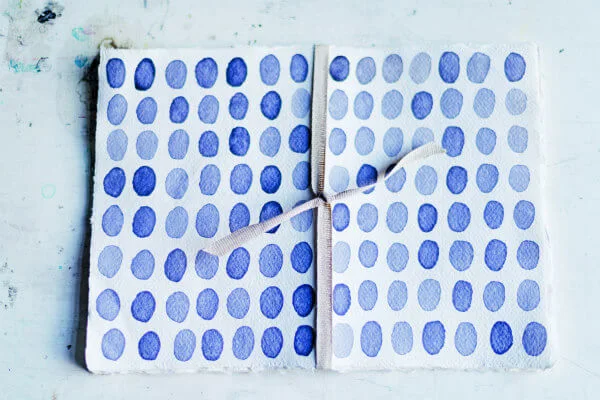
Rachel Hazell, aka The Travelling Bookbinder, leads paper-themed trips in Europe, hosts workshops in Paris and on the Isle of Iona in Scotland, and offers popular PaperLove and BookLove e-Courses. And now she has written a how-to book called Bound... 15 Beautiful Bookbinding Projects that provides easy to follow directions and inspires with gorgeous photographs like this one of the Ribbon Bound Pages tutorial.
I'm delighted to share with you how to make the handy booklet directly from the pages of Bound, courtesy of Kyle Books.
Ribbon-Bound Pages is a useful little book that would be perfect for a sing-along this holiday season... print lyrics on each page, tie with a red ribbon, and the carolers will be in sync. Another idea would be to bind the pages of a wedding program and use an organdy or satin ribbon for an elegant look.
Ribbon-Bound Pages
Rachel Hazell
An unassuming and charming way to bind a series of pages together. This book looks wonderful with raw deckle-edged paper, so seek out quality materials for this project. Perhaps now is the opportunity to use that ribbon you've been saving for just the right occasion. Bring back the tradition of a keepsake, and give a ribbon-bound memento to someone you treasure.
You'll Need:
1. Fold the three sheets of paper in half widthways, and open them out flat.
2. Decorate one side of one sheet with an inky pattern.
You'll Need:
- 3x sheets of a4 textured cotton rag paper, such as khadi (handmade paper theoretically doesn't have a particular grain direction, but if you have an option, choose short grain) [Ann's edit: for U.S. readers, a4 is roughly the size of our 8.5 x 11 sheet]
- large awl or Japanese screw punch
- 60cm (24in) length of ribbon, (minimum 3mm (1/8in) / maximum 8mm (1/3in) wide), unbleached linen or smooth satin neon, according to taste
- scissors
- sticky tape
- watercolour ink
- brush
1. Fold the three sheets of paper in half widthways, and open them out flat.
2. Decorate one side of one sheet with an inky pattern.
3. Make a generous hole, by finding the middle of the centre crease and, using an awl or screw punch, go through all three sheets.
4. Cut a length of ribbon that is three times the height of your book. With all the folded pages together (and holes lined up), start threading the ribbon through the center hole, from the outside to the inside. If this is tricky, try a) adding sticky tape to reinforce the ribbon end, cut into a point, or b) making the hole bigger.
5. Holding onto the tail end of the ribbon with a spare finger, take the ribbon up and over the top of the pages, down the outside spine and under the book's bottom edge.
6. Bring the ribbon back up to the middle and ease it through to the outside of the book. Ensure that both ends lie on opposite sides of the long length of ribbon.
7. Now tie a double knot (or a bow if the tails are long enough) and trim the ribbon ends diagonally to stop them fraying.
7. Now tie a double knot (or a bow if the tails are long enough) and trim the ribbon ends diagonally to stop them fraying.
Thank you, Rachel Hazell and Kyle Books.
If you're a paper lover like me, this book makes for excellent bedtime reading as well as placing it squarely on your table while you work. The introduction is akin to enjoying a cup of tea with Rachel and the information in the tools, materials, and techniques sections is enlightening. Slit Book, Concertina with Pockets, Turkish Map Fold, Flip Flap Tab Book and more... try them all!


Delightful and doable! I love the spotty paper too.
ReplyDeleteI love it too, Lisa! Such a nice way to keep the ribbon securely in place.... no slipping around.
DeleteI so enjoy making little books.
ReplyDeleteI'm glad this post spoke to you Beverly, happy making!
Delete