Monogrammed Marriage Ketubah
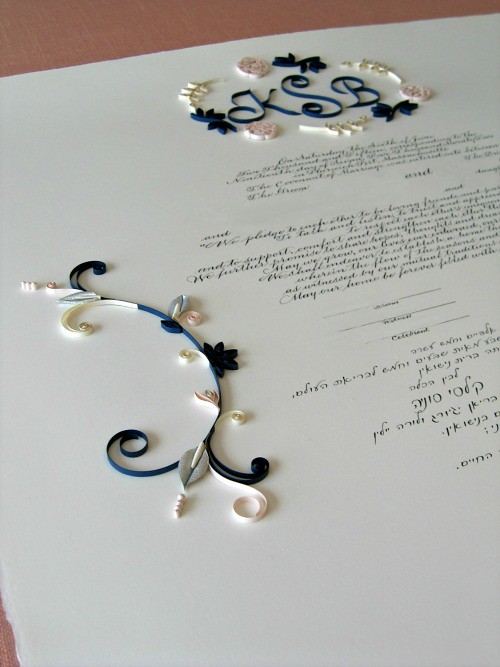
Just a quick post today to show you the completed ketubah I shared in-progress, along with some thoughts on how I go about finishing custom quilled wedding pieces.
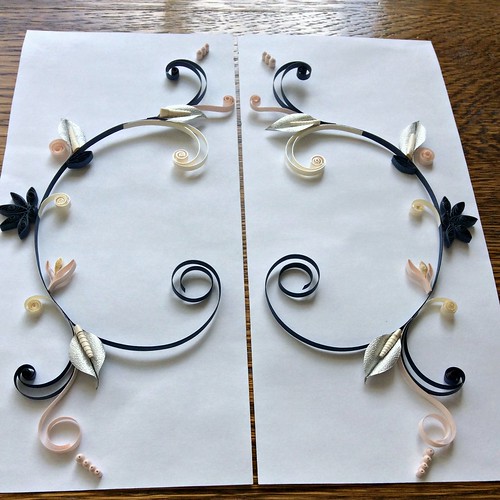
Here are the two side scrolls on my worktable, ready to be glued in place... actually, I wound up trimming and re-rolling the largest navy scroll toward the center bottom of each side as I realized it was a little too leggy. Taking a photo offers a fresh perspective, as I notice things I might not have seen when looking at the layout directly.
Like anything, it takes lots of practice to make scrolls that are identical in size. And once the paper is curled it wants to return to that position - truly, like it has a mind of its own! I've learned when doing final gluing to not argue with a scroll even though it can be tempting to want to jiggle it into a slightly different position. The curve will never look as smooth.
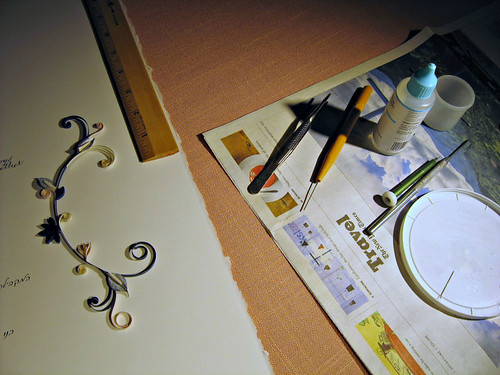
Very few supplies are used for the final gluing stage, well, except for massive amounts of patience. Due to dreary skies last week, I hooked up a couple of big lights on a tripod purchased for book photography last summer. They were a huge help as I was able to aim the shine exactly where needed. I usually work in two-hour periods over several days to do the gluing and use my favorite acid-free, clear gel adhesive. I hold the scroll or other shape with fine-tip tweezers and apply tiny dots of glue to the underside of small sections at a time with the tip of a straight pin. Any excess is quickly whisked away with a second pin and/or slightly damp microbrush.
Now it's time for the ketubah to be packed, shipped, framed and hung. I hope the couple will enjoy having it in their home for many years to come!
Calligraphy by Riva Brown of Living Letters Studio
Here are the two side scrolls on my worktable, ready to be glued in place... actually, I wound up trimming and re-rolling the largest navy scroll toward the center bottom of each side as I realized it was a little too leggy. Taking a photo offers a fresh perspective, as I notice things I might not have seen when looking at the layout directly.
Like anything, it takes lots of practice to make scrolls that are identical in size. And once the paper is curled it wants to return to that position - truly, like it has a mind of its own! I've learned when doing final gluing to not argue with a scroll even though it can be tempting to want to jiggle it into a slightly different position. The curve will never look as smooth.
Very few supplies are used for the final gluing stage, well, except for massive amounts of patience. Due to dreary skies last week, I hooked up a couple of big lights on a tripod purchased for book photography last summer. They were a huge help as I was able to aim the shine exactly where needed. I usually work in two-hour periods over several days to do the gluing and use my favorite acid-free, clear gel adhesive. I hold the scroll or other shape with fine-tip tweezers and apply tiny dots of glue to the underside of small sections at a time with the tip of a straight pin. Any excess is quickly whisked away with a second pin and/or slightly damp microbrush.
Now it's time for the ketubah to be packed, shipped, framed and hung. I hope the couple will enjoy having it in their home for many years to come!
Very elegant and beautiful..
ReplyDeleteThis is absolutely beautiful. I am always in admiration in front of your art.
ReplyDeleteFrancine
What a wonderful heirloom for that couple. So exquisite. Martha Stewart clear glue - eureka. I have been looking for a clear glue for very small pieces on cards after not having success with Rang..multi-med. matte product. Thanks.
ReplyDeleteThank you all for the kind comments! Yes, I really like Martha's glue and just wish it was still sold at Michael's as it was so convenient to get it there. Now I order it on Amazon.
ReplyDeleteAs always - outstanding!
ReplyDeleteGail
Aw thanks, Gail! I hope you're doing well.
ReplyDeleteLove, love, LOVE!
ReplyDeleteThank you, Kim!
ReplyDelete