There’s no need to shop for special
quilling supplies - any stiff wire or even a cocktail pick will be fine as a substitute
tool. Practice
rolling coils with narrow strips cut from a sheet of computer paper. Once you've mastered
the knack, use metallic quilling paper to give your seashells a pearlized shine.
Card Making Supplies:
Card stock - light blue, medium blue
Text weight paper - light blue
Paper cutter with scoring blade
Double-stick tape or glue stick - to adhere layers
Decorative edge scissors - waves or Victorian
Paper crimper
Sentiment rubber stamp
Black ink pad
Metal charms - shell and seahorse (mine were from Custom Quilling a while ago, but I've seen some at craft stores and on Etsy)
Quilling Supplies:
Pearlized quilling paper - 1/8 inch, aqua, light green, lavender (or cut strips from sheets of text weight pearlized paper)
Quilling tool - a slotted tool is easiest for beginners, but a needle tool gives a nice, crimpless look
Detail scissors
Ruler
Tweezers - to handle quilled coils
Aleene's Tacky Glue - grips well on pearlized paper
Paper piercing tool or cocktail stick - to apply glue to quilled coils
Plastic lid or waxed paper - to use as a glue palette
Damp cloth - to keep fingers glue-free
(More paper craft products I recommend can be found in my Amazon shop.)
Instructions:
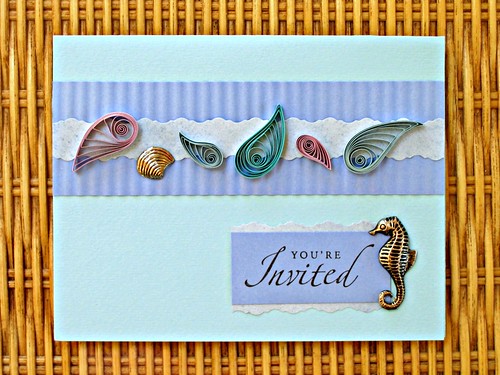
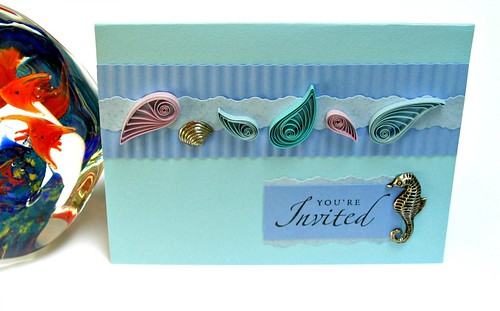
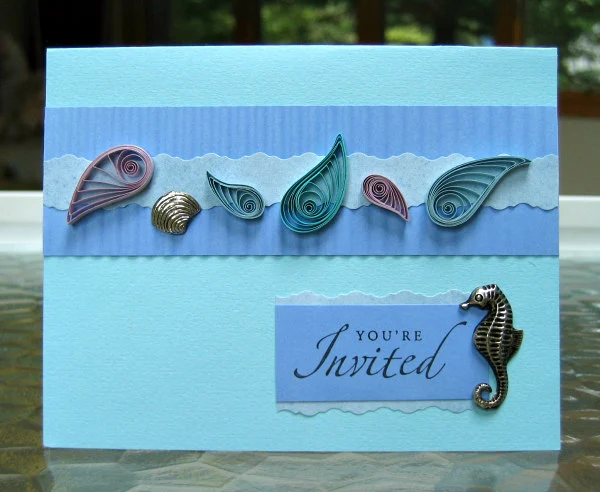
1. Cut an 8.5 x 5.5-inch rectangle of light blue card stock. Score at the midpoint to make a top fold card.
2. Cut and crimp a 6 x 1 5/8-inch piece of medium blue card stock. Adhere to the card and trim excess at ends with scissors.
3. Cut the top and bottom edges of a a 6-inch long rectangle of light blue text weight paper with decorative scissors to measure about 5/8-inch wide. Adhere to the center of the crimped strip, trim the ends, and adhere to the card.
4. Stamp a sentiment on a piece of medium blue card stock, then trim it to make a 2 1/4 x 1-inch rectangle, centering the sentiment. Use decorative edge scissors to cut the top and bottom edges of a light blue text weight paper rectangle that is a bit larger than the card stock rectangle. Adhere it to the back of the card stock, trim the ends, and adhere to the card.
5. Quilled shells: Make three 16-inch shaped teardrops and two 8-inch shaped teardrops in various colors of pearlized paper.
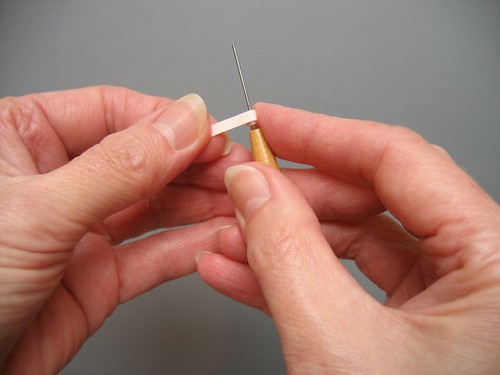
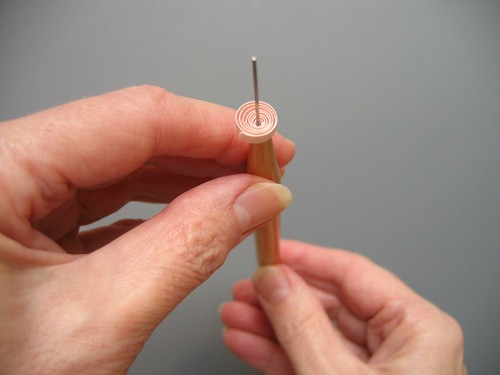
To make a shaped teardrop, dampen fingertips slightly (if needed) and place one end of a paper strip across the needle of a quilling tool. Using the thumb and index finger of whichever hand feels most comfortable, roll the strip around the needle using even tension while holding the tool handle with your other hand. Be sure to roll the paper, not the tool.
When the strip end is reached, allow the coil to relax and slide it off the tool.
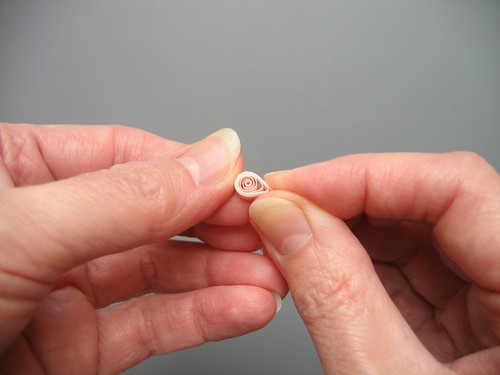
Pinch the coil to make a teardrop. Trim excess strip length at the point and secure the end with a small amount of glue, holding it in place for a moment to allow the glue to set. Grasp the point between your thumb and index finger and curve it gently.
6. Spread a thin layer of glue on a non-stick surface. Holding a teardrop with tweezers, lightly touch one side to the glue, then place it directly on the card where desired. Try not to slide it into position to avoid leaving a shiny snail trail. Glue the remaining teardrops in place, arranging them to look like sea-tossed shells.
7. Lastly, apply glue to the charm backs and adhere them to the card.

