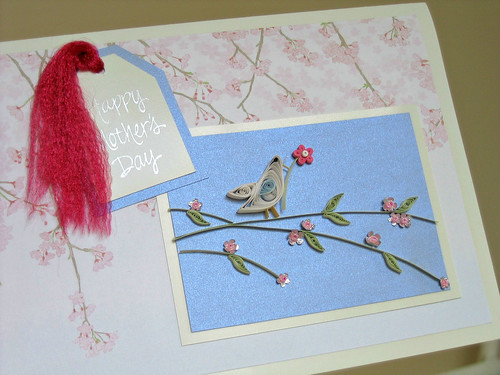
Put a Bird on It - Quilled Mother's Day Card DIY
I just thought of a project that could have been included in my quilled bird round up post. It's even timely because it's a Mother's Day card... which will be here before we know it.
I'll detail how to make the quilled design:
These two photos were taken at the same time, just at different angles. The quilling is glued onto light blue metallic paper - ooh, just like a sunny day, I thought when I chose it. Yet when the camera looks at it straight on, it's gloomy gray instead. There's a metaphor in there somewhere.
Never mind... I'm sure you'll have better luck with your card! The background paper is from the fab site, Canon Creative Park - it's free cherry blossom stationery that you can print out (there is even a matching envelope).
If you'd like to make the quilled design (which was inspired by a rubber stamp), here's how:
Narrow (1/16 inch) quilling paper gives a delicate look, but standard 1/8 inch would be fine too.
1. Make the punched cherry blossoms and quilled leaves - the instructions are detailed in a Mother's Day card I made for Makezine - here's that tutorial.
2. Make the bird - roll a 20-inch white, shaped coil to which you'll add two wings - the pale blue teardrop wing is 5 inches and the white triangular one is 10 inches.
3. Add a teeny 1/2-inch black tight coil for the eye, a yellow beak and legs, and green stems. For the beak, legs, and stems, cut strips from card stock or glue two quilling strips together for extra strength since they will stand on edge.
4. Lastly, make a five petal flower using a 3-inch pink strip for each tight coil oval petal and add a 2-inch white tight coil center.
If you've never quilled before, you'll find all the instructions you'll need to get started in these quilling tutorials.
Recommended quilling and paper craft supplies can be found in my Amazon shop.


