Rolled Book Page Wreath Tutorial
If you've been thinking of making a rolled book page wreath, now just might be the perfect time to do it. Licia Politis made the examples you see here, inspired by some she saw on Pinterest. They're
big, colorful, and a pretty decoration for the holidays or anytime,
depending on your choice of accessories.
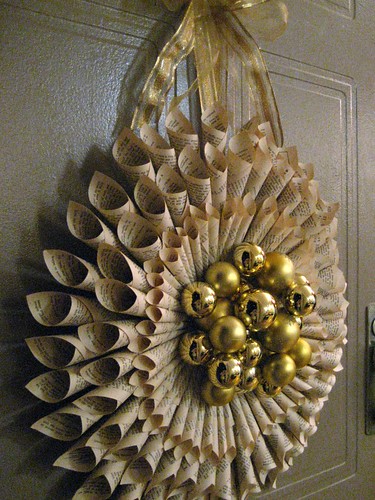
Licia added lots of her own touches. It's hard to choose a favorite, but I'm drawn to the combination of shiny and matte gold ornaments in the center of this tri-layer elegant beauty.
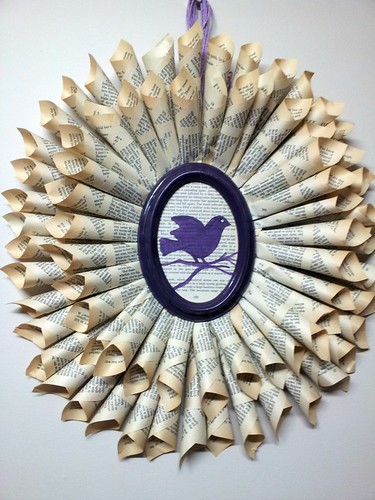
Here's an oval wreath that would look great all year long. Licia upcycled an old frame by spray painting it deep purple and then painted a purple bird on a book page as the central motif. Pages with edges that are beginning to yellow look especially nice when rolled due to the color variation.
Lucky for us, Licia jotted down a list of construction tips that I used to write up these instructions.
Supplies:
Old book pages - about 70 - Licia likes to use paperback books because the pages tear out easily and the paper is a nice weight for rolling.
Corrugated cardboard - about 12 inches (30 cm) square
Ribbon - 20 inches (1/2 meter)
Ball ornaments - 12
Staple gun
Hot glue gun
Craft glue or glue stick
Scissors
Compass - optional
Instructions:
Step 1. Roll a single book page into a cone. Staple the end approximately 3/4 inch (2 cm) from the tip. Repeat x 70.
Step 2. Trim the cardboard corners to make a circle (or you can just leave it square) and draw two evenly spaced circles within the circle as guidelines for the two layers of cones.
Step 3. Optional - If your wreath will be hung where the cardboard backing can be seen (i.e. through a glass door or window), cover the cardboard by gluing on extra pages with craft glue or a glue stick.
Step 4. Attach the hanging ribbon/bow to the top back of the cardboard. Trim ends with scissors.
Step 5. With tips facing inward, hot glue four cones at the north, south, east, and west points using the outermost drawn circle as a guideline for tip placement. Continue filling in between these cones until the first layer is complete.
Step 6. Repeat for the second layer using the innermost circle as a guide.
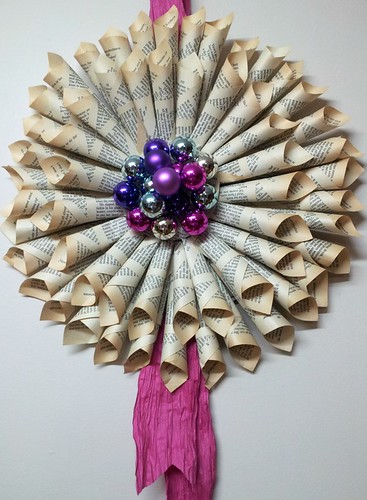
Step 7. Arrange and hot glue colored balls at the center.
Step 8. That's it - hang and enjoy all season long!
Paper craft supplies I recommend can be found in my Amazon shop.

If you make a purchase from an Amazon or Etsy link, I will receive a small commission
at no additional cost to you. Thank you for supporting All Things Paper.
Licia added lots of her own touches. It's hard to choose a favorite, but I'm drawn to the combination of shiny and matte gold ornaments in the center of this tri-layer elegant beauty.
Here's an oval wreath that would look great all year long. Licia upcycled an old frame by spray painting it deep purple and then painted a purple bird on a book page as the central motif. Pages with edges that are beginning to yellow look especially nice when rolled due to the color variation.
Supplies:
Old book pages - about 70 - Licia likes to use paperback books because the pages tear out easily and the paper is a nice weight for rolling.
Corrugated cardboard - about 12 inches (30 cm) square
Ribbon - 20 inches (1/2 meter)
Ball ornaments - 12
Staple gun
Hot glue gun
Craft glue or glue stick
Scissors
Compass - optional
Instructions:
Step 1. Roll a single book page into a cone. Staple the end approximately 3/4 inch (2 cm) from the tip. Repeat x 70.
Step 2. Trim the cardboard corners to make a circle (or you can just leave it square) and draw two evenly spaced circles within the circle as guidelines for the two layers of cones.
Step 3. Optional - If your wreath will be hung where the cardboard backing can be seen (i.e. through a glass door or window), cover the cardboard by gluing on extra pages with craft glue or a glue stick.
Step 4. Attach the hanging ribbon/bow to the top back of the cardboard. Trim ends with scissors.
Step 5. With tips facing inward, hot glue four cones at the north, south, east, and west points using the outermost drawn circle as a guideline for tip placement. Continue filling in between these cones until the first layer is complete.
Step 6. Repeat for the second layer using the innermost circle as a guide.
Step 7. Arrange and hot glue colored balls at the center.
Step 8. That's it - hang and enjoy all season long!
Stay tuned for another type of book page wreath coming up soon.
Thanks Licia!
Thanks Licia!
Paper craft supplies I recommend can be found in my Amazon shop.
If you make a purchase from an Amazon or Etsy link, I will receive a small commission
at no additional cost to you. Thank you for supporting All Things Paper.


These are stunning
ReplyDeleteI've seen quite a few of these floating around on Pinterest. I love the looks of them. Thanks for sharing the tutorial. I just might make one this weekend.
ReplyDeleteLovely Wreath and so easy to make too. Thanks for the instructions Ann.
ReplyDeleteThank you for this tutorial! I just made one!! Here is the link to mine!!
ReplyDeletehttp://writebeforeyoureyes.blogspot.com/2012/11/something-wicked-this-way-comes.html
It's very pretty Shannah; thanks for sharing your link.
DeleteSo glad you liked seeing Licia's wreaths - me too! She gets all the credit.
ReplyDeleteA wreath made from rolled Christmas carol music sheets would be a lovely holiday variation, too!
ReplyDeleteOoh, good idea!
DeleteSpent the summer collecting hymn books from garage sales. Everyone LOVES the wreaths I made from those.
DeleteGlad to hear that, Susan!
DeleteImi place mult ideea ! O sa incerc si eu poate si in alte variante......
ReplyDeleteKlasse Page. Danke.
ReplyDeleteThese are so pretty!
ReplyDelete