Quilled Valentine Card Tutorial
Here's another idea for a handmade valentine card with just a touch of quilling. A friend in Dubai sent me a sheet of embossed metal butterfly stickers and I just had to incorporate one on a card right away. Even though it's not a typical valentine motif, it reminds me that warmer, less snowy days are coming! A heart sticker, or a quilled heart, would look pretty in the center instead.
The quilling in each corner is made up of an oval tight coil, a V scroll, and an asl (alternate side loop) petal.
Directions to make each shape:
Oval tight coil - Roll a 2 inch tight coil and glue torn end before slipping coil off tool. Use tweezers to pinch it into an oval shape.
V scroll - Fold a 2 1/2 inch strip in half. Roll each cut end outward to make a V.
Petal - Begin by making a 3/8 inch fold at one end of a strip (or however tall you'd like your petal to be).
Continue using the same strip without cutting it and make a second fold, this loop will go to the left of the first one, but won't be as tall.
Make another loop, this one to the right of the first fold, and the same height as the opposite loop.
Make a second pair of loops, one on each side of the first pair, but shorter. Here's the first loop of the second pair... you'll need to make just one more loop on the right.
Encircle all of the loops with the continuous strip, creating a collar. Trim excess strip at the bottom and glue end.
Pinch top of collar to make a point/petal.
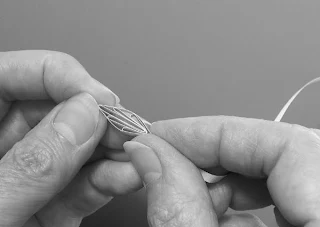
Tip: So that each petal is the same size, make the first fold on four separate strips. Hold them next to one another to check the heights.
Use tweezers to dip a shape in a shallow glue puddle that's been spread on a plastic lid or piece of waxed paper, then place it directly on the card.
Quilling and other paper craft supplies I recommend can be found in my Amazon shop.