Putz House Snow and Glitter Tutorial

Perhaps it's so hot where you are right now you're wishing for snow or maybe it IS winter and the timing of this post is perfectly appropriate. Either way, I hope you'll enjoy all the tips that Carol Fisher of Chicago has to share about decorating tiny paperboard putz houses.

She designs a variety of super-cute kits for Etsy shop Holiday Spirits Decor. Frankly, it's never too early to start thinking about... you know... that holiday. I dare not mention the C-word since it is only August, but like Boy Scouts, we will be prepared!


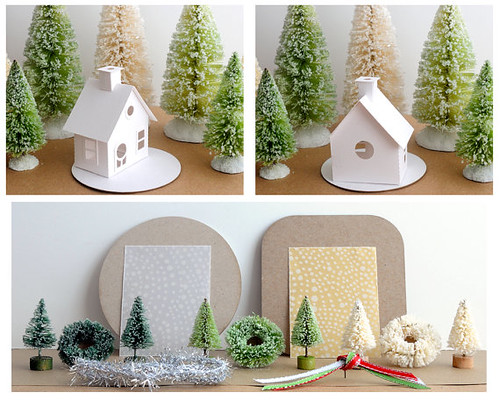
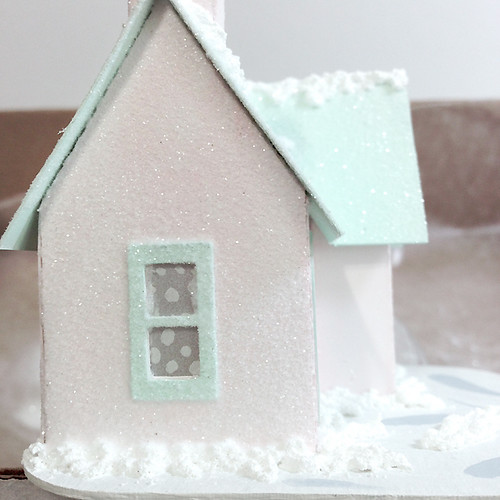
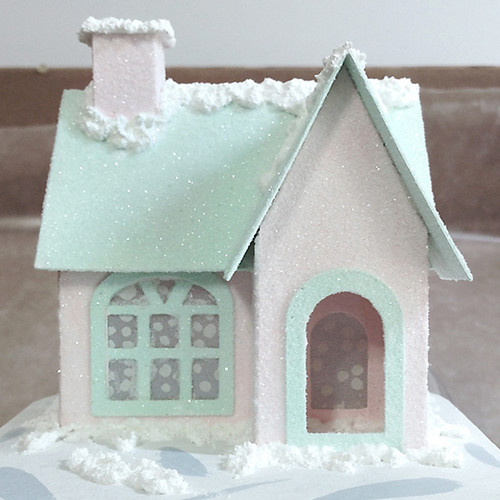
glittered paper putz house displayed with pink and ivory bottle brush trees and ornaments

 
Bright white Bristol board houses look adorable on their own, but dress them up with a coat of paint and glistening snow and they'll become even sweeter.

Let's get started!

Putz House Ornament Kit / AllThingsPaper.net

 
Having ordered one of Carol's beautifully packaged kits, I can tell you it is just like opening a present. Inside you'll find pre-scored buildings, hand-glittered bottle brush trees, sisal wreaths, dotted vellum, silver tinsel and ribbon along with directions for assembling and decorating.

Keep in mind though, that the following snow and glitter directions can be applied to any paperboard house you might have.
 
NOTE: Scroll down for 2021 and 2022 tutorial updates.

Overview:

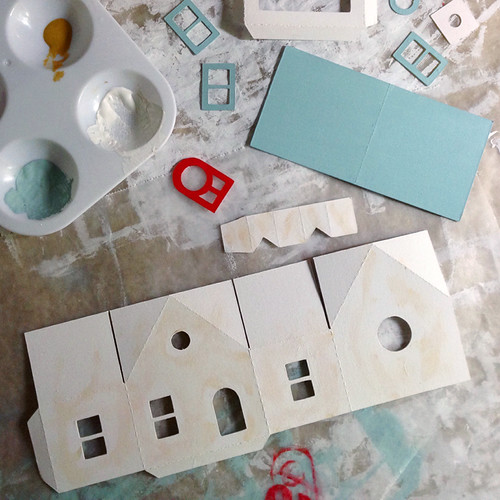
1. paint walls, roof, window and door trim
2. cover windows inside with vellum
3. glue on window and door trim
4. fold and glue the house
5. glue house to base
6. add snow and glitter

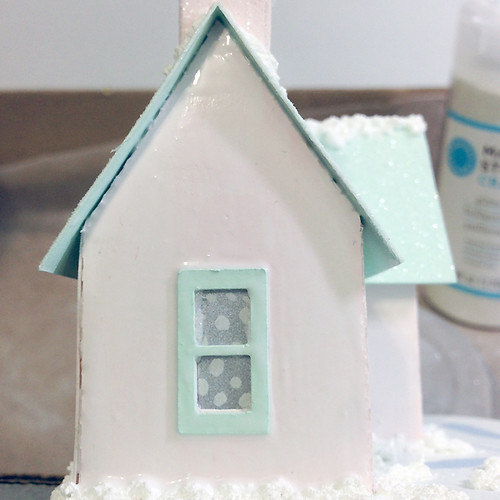
This is an example of painted components that will be assembled before snow and glitter are added.
 

How to: decorate a putz house / AllThingsPaper.net

 
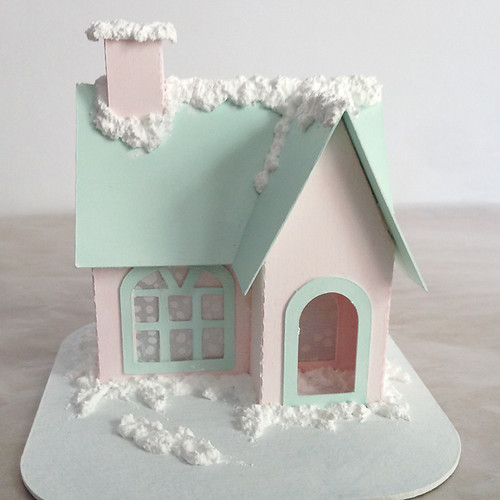
Here's how to add realistic snow to the roof and base of a painted house:


How to: decorate a putz house with snow / AllThingsPaper.net

  Note: All Things Paper is an Amazon and AWIN (Etsy) affiliate.
 
 
Snow Supplies:
   
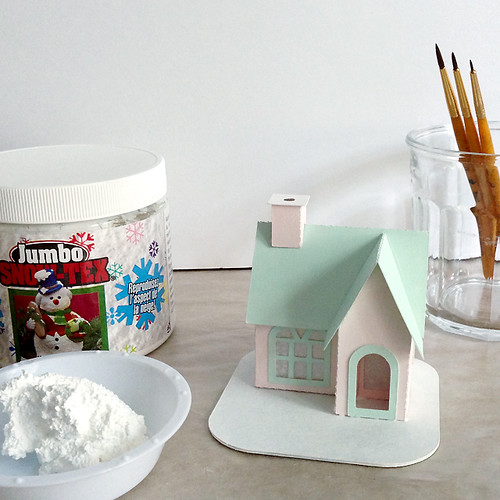
 Deco Art Snow Tex   
 Medium flat paintbrush   
 Small round paintbrushes   
 Cup of water to clean brushes


How to: decorate a putz house with snow / AllThingsPaper.net

 
1. Put a heaping tablespoon of Snow Tex in a small container.
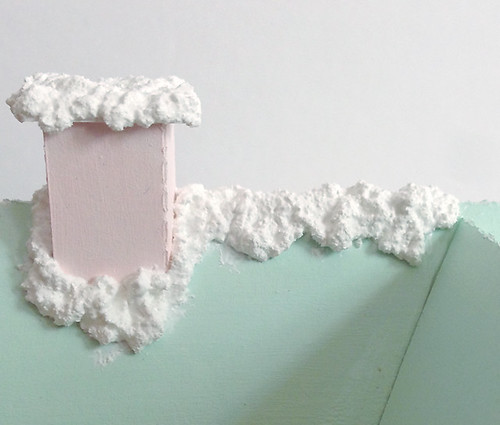
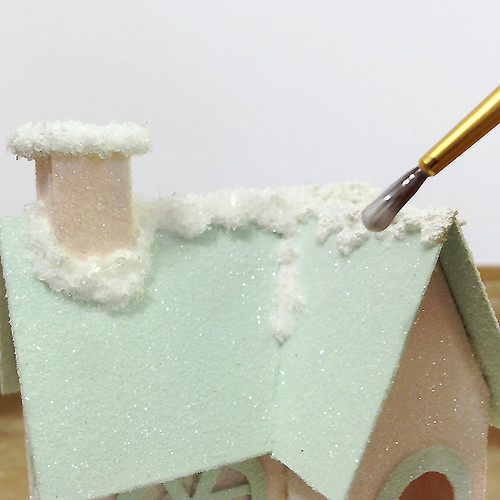
2. Use a flat paintbrush to place dabs of snow around the chimney top.
3. Use a small round paintbrush to push and move the snow, covering the chimney top.
4. Add more snow as necessary.
5. Push small drifts over the edges of the chimney top to cover and create drips.


How to: decorate a putz house with snow / AllThingsPaper.net

 
6. Use a round paintbrush to apply dabs of snow around the sides and bottom of the chimney.
7. Use the point of a small round brush to move the snow into drifts.
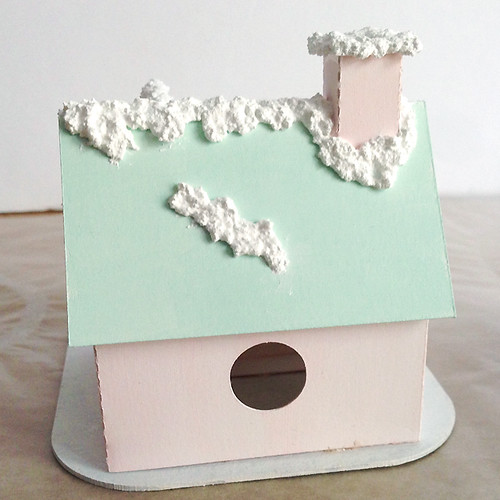
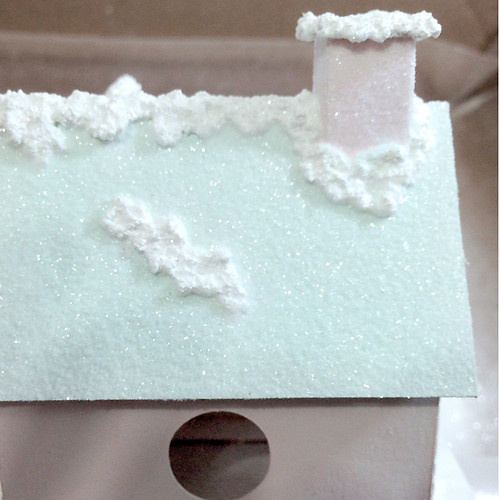
8. Continue applying dabs of snow across the roof peak, using the round brush to form drifts of snow all the way across.
9. Be sure to make drifts on both the front and back side of your roof.
10. Add a couple snowdrifts across the lower open roof areas for fun!
11. Use the same process to add snow around the house and create a snowy landscape in the yard.
 

How to: decorate a putz house with snow / AllThingsPaper.net

 
Tips:

These extra little snowdrifts create a more 3-D look to the ornament base.
Think about where you want to place your bottle brush trees so they don’t cover up the snowdrifts.
Let the house dry 6 hours to overnight…and you’re ready to glitter!   

The following explains what you'll need to do to glitter your houses so they'll look just like they've received a frosty shimmer.

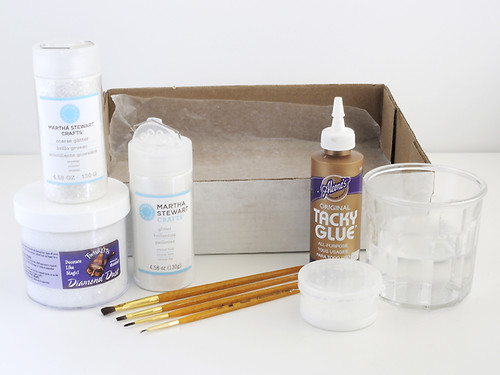
Glittering Supplies:
 

How to: decorate a putz house with snow and glitter / AllThingsPaper.net

 
Larger size crystal glitter - for the snow and ornament base (I like both Martha Stewart Crafts Coarse Glitter [no longer available] and Floracraft Diamond Dust Crystal Twinklets)
Small and medium flat paintbrushes
Small round paintbrushes
Cup of water - so glue doesn’t dry on your paintbrushes while you apply glitter
Shallow box or tray lined with wax paper to catch and reuse glitter (cardboard plant boxes from my local nursery are perfect)
Bright lighting - helps you see the glue for fewer missed spots and edges
 

Mix Your Glue:

1. In a small baby food size container, dilute 2-3 tablespoons of Tacky Glue with enough water to thin the Tacky Glue to an icing glaze consistency that will be easily spreadable, but not runny.
2. Get your wax paper-lined box and ultrafine glitter ready. You’re going to glitter the painted surfaces of the house first.

 
The Chimney is a perfect starting place because it is small and easy to cover.

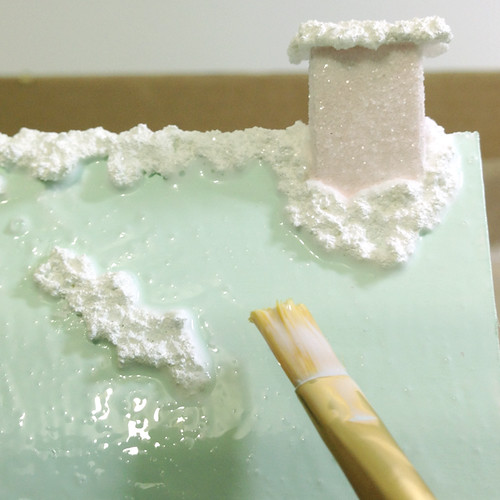
1. Use the pointed tip of a small round paintbrush to apply glue around the snow, pushing glue into the little nooks and crannies at the base of the chimney.
 

using a brush to apply glue to a paper putz house roof

 
2. With a flat paintbrush, evenly cover each side of the chimney with glue.
 

How to: decorate a putz house with snow and glitter / AllThingsPaper.net

 
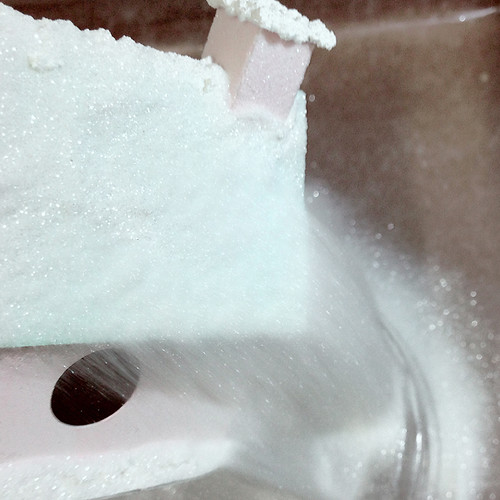
3. Hold the house over your wax paper/box. Shake ultrafine glitter over each side of the chimney.
4. Shake excess glitter into the box.
 

Back and Front Roof: Same process… just over a bigger surface!

 
1. Use the pointed tip of a small round paintbrush to smoosh glue into all the nooks and crannies around the snow.
2. Use a medium flat paintbrush to apply glue along roof edges… be generous!
3. Cover the center area of the roof with glue.
4. Even out glue with long strokes, all the way to the edges.
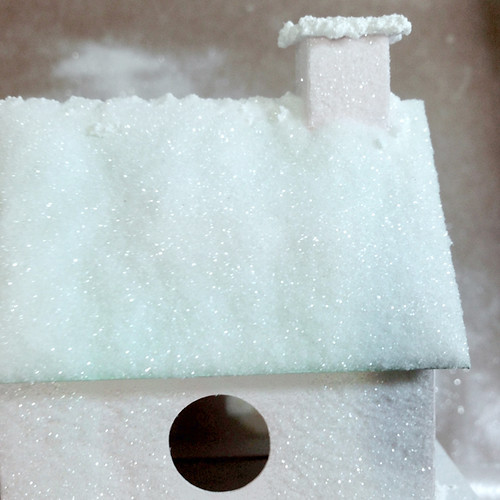
5. Hold the house over your wax paper/box. Shake/pour a thick layer of ultrafine glitter over the roof.
 

How to: decorate a putz house with snow and glitter / AllThingsPaper.net

 
6. Shake excess glitter into the box. Check for missed spots and touch up if needed.
 

How to: decorate a putz house with snow and glitter / AllThingsPaper.net

How to: decorate a putz house with snow and glitter / AllThingsPaper.net

 
House: You’ve got this! Glitter one side of the house at a time using the same process.
 

How to: decorate a putz house with snow and glitter / AllThingsPaper.net

How to: decorate a putz house with snow and glitter / AllThingsPaper.net

How to: decorate a putz house with snow and glitter / AllThingsPaper.net

 
Tips:

1. Remember to cover the eaves (underside of roof overhang).
2. Be generous with glue and work quickly to cover these larger areas.
3. Carefully apply glue to the corners/edges.
4. Smooth glue with long strokes.
5. Use a small round brush to apply glue to window/door trim.
6. Let the glittered house dry for 1-2 hours before handling.

 
Base snow: Now it's time for the larger vintage style glitter to cover the snow and ornament base.

1. Working in 1-2 inch area at a time, use a small round paintbrush to apply glue to the snow along the roof and chimney.
 

How to: decorate a putz house with snow and glitter / AllThingsPaper.net


2. Cover snow with a generous amount of the larger Diamond Dust or Martha Stewart Coarse Glitter.
3. Use a medium flat paintbrush to apply a generous coat of glue to the snow around the house and the entire top of the ornament base. Sprinkle with larger glitter. Let dry.
4. Glitter bottom side of ornament base. Let dry.

How to: decorate a putz house with snow and glitter / AllThingsPaper.net


Your Putz House Ornament is all glittered and ready to adorn with bottle brush trees, a wreath, tinsel twine, and ribbon!


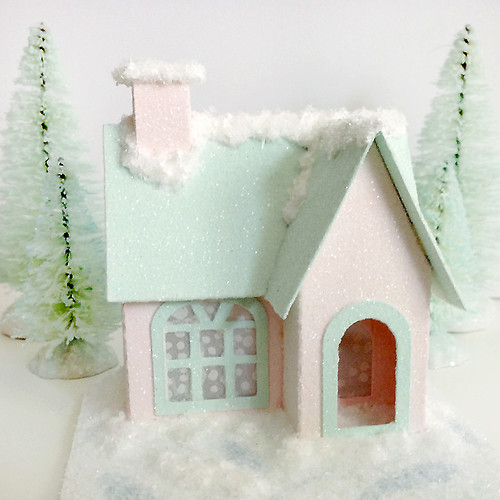
glittered paper putz house displayed with pink and ivory bottle brush trees and ornaments

2021 Update! In answer to a reader's question, Carol explains about glass glitter and whether it is necessary to seal it:


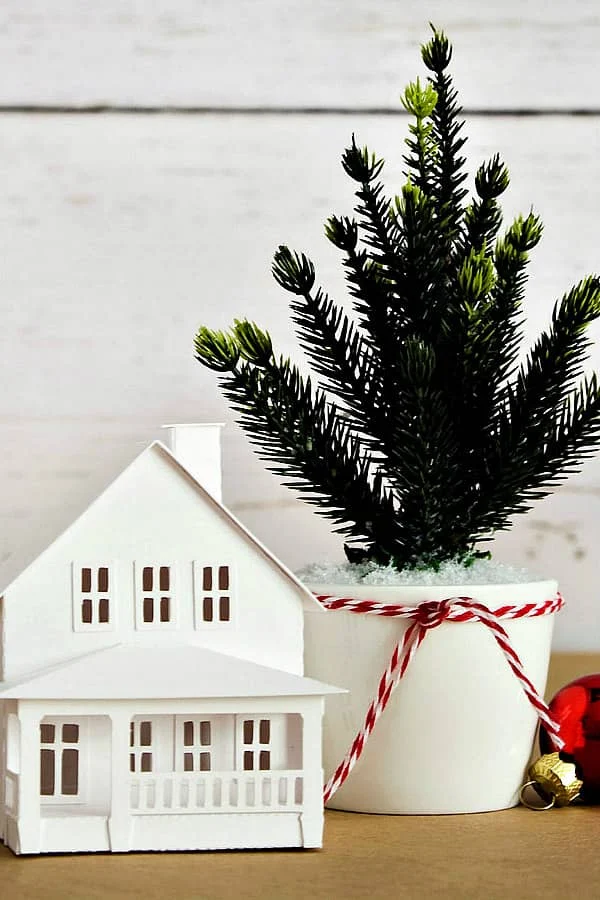
tiny white paper house on table next to potted evergreen with Christmas baubles

"Ultrafine or Extra Fine (90-100 grit) Glass Glitter, used on ornaments and greeting cards, has a sand-like texture without sharp edges and is the size you would typically use for putz houses. Like sand, you need to keep it away from eyes and children’s mouths. Glass glitter isn’t considered appropriate for use with children under 8.


The larger glass glitter I use to cover snow (70-80 grit) like Floracraft Diamond Dust Crystal Twinklets feels slightly prickly and should be handled with a light touch.


I suggest trying a glitter adhesive like Art Institute or Glass Tac to reduce shedding. These adhesives work well for me and I don’t seal my glitter houses. The clear versions of Krylon Glitter Blast or Rustoleum Glitter Sealer Spray come highly recommended to seal glitter and keep a natural shine.


Meyer Imports is a wonderful source of information about high quality Glass Glitter and Adhesives."


2022 Update!


Carol suggests glittering the Window & Door Trim before gluing the Trim on the house to improve glitter coverage and easier application on those little details.


Also, glitter the House before adding the Roof. It makes applying glue much easier without having the Eaves to fuss with. When dry-fitting the Roof to the House, mark the Eaves and glitter that small strip before gluing on the Roof.


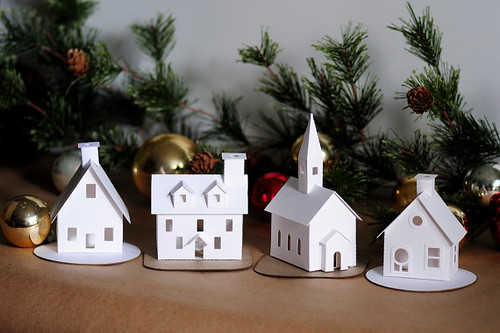
Putz House Village from Holiday Spirits


Visit Holiday Spirits Decor on Etsy to see many more ideas for decorating a variety of putz houses for Christmas and Valentine's Day. 


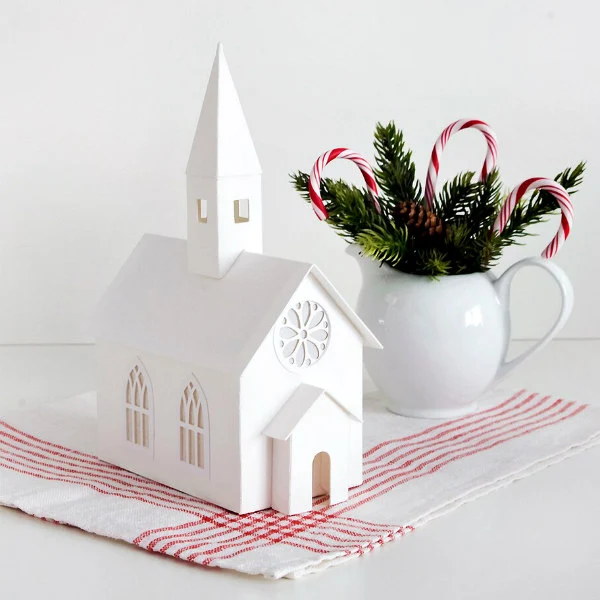
miniature white card stock rose window putz church displayed on red and white tea towel and placed next to white pitcher full of greenery and candy canes.

Carol is on Instagram too - HolidaySpiritsDecor.


tiny paper putz house decorated for winter with glittered snow drifts

If classic putz houses aren't your style, you can make a batch of these DIY mid-century ranch houses via Casey of Casey Starks Studio and trade the frosty snow for some glittery sand and palm trees!


Five mid-century ranch houses made of paper with holiday decorations, palm trees, car and trailer


Ann Martin
Ann Martin

This is a short biography of the post author and you can replace it with your own biography.

Comments

  1. Great decorating ideas! I think the polkadots on the windows are my favorite little detail.

    Thanks so much for linking to my retro houses, too! :)

    ReplyDelete
    Replies
    1. I'm so glad you enjoyed the post, Casey. I love your wonderful retro houses too!

      Delete
  2. Oh what fun it is! I can sense your tingling thrill as you shook off the excess snow and unveiled the perfectly cover house. Thanks for sharing your sweet escape into some cooler weather! I also love the polka dot windows :D

    ReplyDelete
  3. Ahh, just love these. Thank you for the tutorial!

    ReplyDelete
  4. Really tempting!! Must have been so much fun making and glittering the house.

    ReplyDelete
  5. Oh this is just GORGEOUS!!! I found you via Craftgawker and goodness was I gawking at your craft! :) I would LOVE for you to join us at The Creative Corner Linkup which goes live 6pm PST. xx

    ReplyDelete
  6. What a cute idea! Something that might be nice to give some of my removals clients over the festive season! Haha! Thanks for the idea!

    ReplyDelete
  7. Wow your glitter house looks stunning as expected! It almost looks like an edible cake top if I hadn’t followed the instructions from the very beginning. This project would be a great activity to get all the children involved so they can create an artpiece while having fun.

    ReplyDelete
  8. Great Post! I am making glitter putz Houses and this is helpful!
    www.allthingspaper.com

    ReplyDelete
  9. Hi Elizabeth, thanks for stopping by! Would love to see your houses when they're ready.

    ReplyDelete
  10. Where can I buy the miniatures and embellishments?

    ReplyDelete
    Replies
    1. Hi Jodism, the house kits can be found in Etsy shop Holiday Spirits and I've linked the supplies, like the glitter, snow, glue, etc., to Amazon... just click on the blue links in the post.

      Delete
  11. Stellasgiggi, so sorry, I accidentally deleted your comment. This is what you said: "I am just starting on making some of these little houses and used the glass glitter. I am a tad worried about it coming off onto peoples' hands and having little sharp pricks. Do you seal it? What would you use? I used spray adhesive and then sprinkled the glitter inside a small box. Your houses are so beautiful!" I'm checking with Carol and you will have her answer as soon as she hears back from the glass glitter company.

    ReplyDelete
    Replies
    1. Thanks for following up on my question. I am anxious to see what is recommended.

      Delete
    2. Stellagiggi, here is Carol's reply. I'm sure you'll find it helpful:

      "Ultrafine or Extra Fine (90-100 grit) Glass Glitter, used on ornaments & greeting cards, has a sand-like texture without sharp edges and is the size you would typically use for putz houses. Like sand, you need to keep it away from eyes and children’s mouths. Glass glitter isn’t considered appropriate for use with children under 8.

      The larger glass glitter I use to cover snow (70-80 grit) like Floracraft Diamond Dust feels slightly prickly and should be handled with a light touch.

      I suggest trying a glitter adhesive like Art Institute or Glass Tac to reduce shedding. These adhesives work well for me and I don’t seal my glitter houses. The clear versions of Krylon Glitter Blast or Rustoleum Glitter Sealer Sprays come highly recommended to seal glitter and keep a natural shine.

      Meyer Imports is a wonderful source of information about high quality Glass Glitter and Adhesives."

      Delete
  12. Thank you so much! I may have overdone it so I will try your suggestions.

    ReplyDelete
  13. This is certainly a well written tutorial and your little house is awesome! I had never heard the term putz houses before. I know I won't actually make any of these but from the directions you provided I am sure I could. I've been a crafter of many mediums through the years but have honed it down primarily to making greeting cards but this is tempting. I so enjoy your blog and admire the work of so many talented artists. Thank you for sharing!

    ReplyDelete
    Replies
    1. Thanks so much for your message! I hope you'll give tiny houses a try someday... they really are fun and satisfying to make.

      Delete
  14. I am wondering why you don't glitter the entire house, then add the snow and the coarser glitter. It seems it would save time by not having to work around the snow crevices. Do you think this would work??

    ReplyDelete
    Replies
    1. Hi Unknown, I forwarded you question to Carol Fisher and this is her answer to your question: I think the Snow material sticks to an unglittered Roof better & makes it easier to manipulate into snowdrifts. The very fine glitter on the House & Roof preserves the detail, but it is so fine, it doesn’t give the Snow much to grab onto & makes it harder for me to control. That said, there’s no reason it won’t work on a glittered roof. You can always try it on a cardboard scrap to see if you prefer working that way!

      Delete
  15. Love your putz houses!! Thank you for the easy to understand detailed instructions! Can’t wait to try!!!

    ReplyDelete
  16. These look awesome! You can make your own Snowtex using white spackle (Home Depot/Lowes) craft sand (Dollar Tree) white water based paint (a small bottle will be plenty.) Mix together in a container with a lid. It dries very hard. Sprinkle glitter on while it's still wet for extra sparkle.

    ReplyDelete

Post a Comment

Thank you for taking the time to leave a comment. I try to respond to questions within 24 hours, so please check back.