Valentine's Day Card Tutorial - Quilled Heart
It's a fun card to make because there's no need to be precise with your coils and that means it goes together pretty quickly.
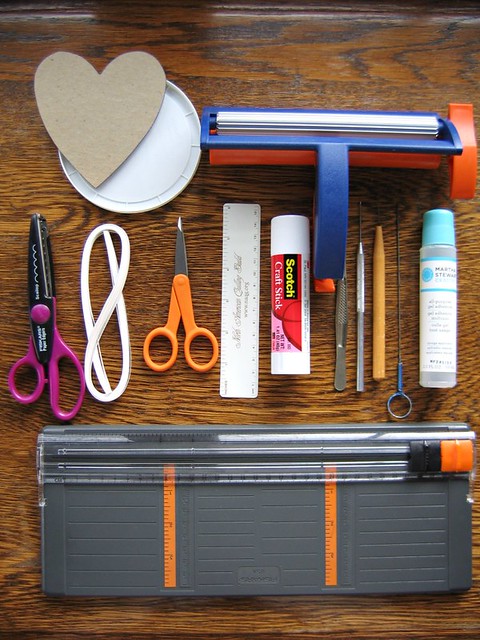
Supplies:
Paper cutter
Paper crimper
Heart template - choose, resize as desired, print, and trace onto cardboard
Computer paper - white, 1 sheet
Patterned card stock or paper - two coordinating designs, 1 sheet of each
Quilling paper - 1/8 inch (3mm) white or cut strips from a sheet of computer paper/lightweight card stock
Quilling needle tool - a cake tester or stiff wire are good substitutes
Scallop-edge scissors
Scissors
Ruler
Tweezers
Glue - my favorite for quilling is a clear gel such as Scotch Glue
Glue stick or double-sided tape - to adhere card layers
Paper piercing tool - to roll large coils and apply glue
Plastic lid - use as glue palette
Damp cloth
Pencil
T-pin, compass - optional
Additional paper craft products I recommend can be found in my Amazon shop.
Instructions:
1. Fold a 10-inch (25.4cm) x 5-inch (12.7cm) piece of patterned paper in half to make a 5-inch square card.
2. Trace cardboard heart onto a sheet of white paper, cut it out with scallop-edge scissors, and crimp heart vertically.
3. Trace around a circular lid that fits inside the heart (or draw a circle with a compass) onto patterned paper. Cut out circle with scallop-edge scissors.
4. Use glue stick or double-sided tape to adhere heart and circle to card.
5. For all of the quilling except the arrow coil, use double-thickness strips. To make a double strip, apply glue to one
side of a full-length strip and lay another on top.
While the glue is still wet, wipe strip gently with a damp cloth to
remove excess. Set strip aside to dry.
Tip: Allow the glue to dry thoroughly or the layers may buckle or separate when rolled.
6. Refer to photo to replicate the eight loosey-goosey rolled scrolls. The two largest are S scrolls and the other six are single scrolls. To make scrolls, roll approximate length strips one at a time around the handle of a paper piercer or quilling tool. Trim excess length.
7. Glue scrolls on scalloped circle: spread a shallow puddle of glue on a non-stick surface (plastic lid works well). Hold scroll with tweezers and touch its lower edge
gently to the glue. Place directly where desired. (This is the fiddly, but best part... I love seeing a design come together!)
8. Make arrow:
a. Cut nine 3/8 inch (1cm) strips, fold each one in half, and glue as shown to longest scroll to make arrow tail.
b. For arrow tip, dampen fingertips and roll a 4-inch (10cm) strip on quilling tool. Use thumb and index finger of whichever hand feels most comfortable to roll the paper while holding tool handle with the other hand. Tip: roll the paper, not the tool.
c. Allow rolled strip to relax into a loose coil. Slide it off the tool and compress coil. If desired, use a T-pin to distribute the coil rotations evenly. Pull center to one end.
d. Pinch the opposite end to a sharp point. Glue end and trim excess.
e. Pinch two points at the opposite end to create an elongated triangle. Glue it to end of arrow.
So there you go... frame it for yourself or send it on its way to someone special.
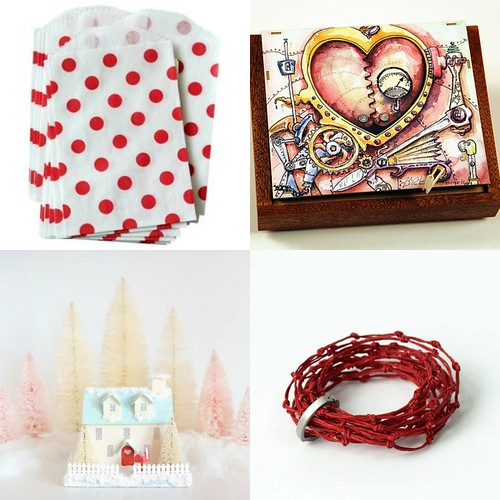
And since we're thinking of Valentine's Day, allow me to shine a spotlight on All Things Paper's love-ly sponsors for a moment. Each offers appealing ideas for holiday gifts and supplies.
Clockwise from top left: 1. Gift Wrap and Party Supplies from Wrap and Revel 2. Steampunk Valentine from MechaniCards [edit: no longer available] 3. Paper Twine and Jewelry from PaperPhine 4. Putz House Valentine Kits and Made-for-You Houses from Holiday Spirits Decor


