Quilled Heart Tutorial Made with Tight Coils
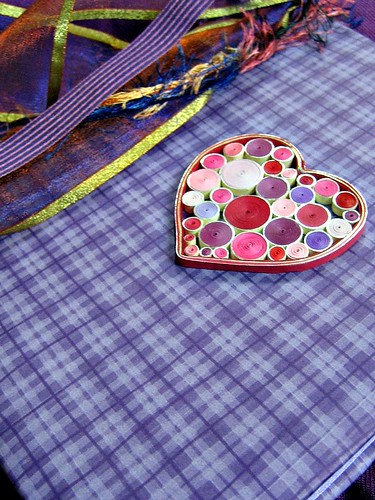
Here's a variation on last week's wrapped paper hearts. Once again, Licia Politis (on Instagram) made the examples and I'm the post writer - teamwork! She used the same ring coil base to create a heart shape, but rather than wrapping the frame with paper strips, she rolled them into quilled tight coils in a variety of sizes and colors. The colorful dots are pretty and the heart frame fills in quickly.
To roll tight coils, it's easiest to use a slotted quilling tool. These are inexpensive and available at many craft stores, as are packages of multicolored quilling paper. You can also cut your own strips from any paper you have on hand using a metal ruler and cutting blade or a paper trimmer. Quilling paper is generally a bit heavier than typical copy paper, but using it to make tight coils would be fine.
Licia gave the heart a different look for this card by gluing the ring coil strips together only at the top curved lines.
To make a tight coil:
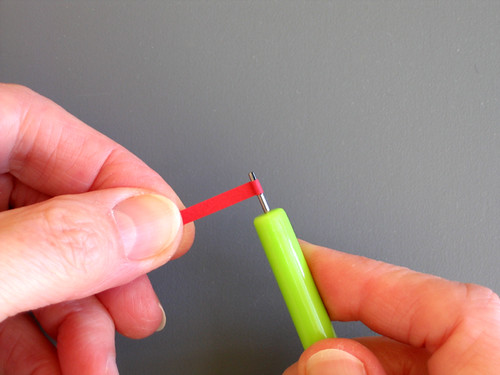
Slide one end of a strip just far enough into the slot so that it doesn't extend beyond the end. Rotate the tool with one hand while guiding the strip with the other.
When the end of the strip is reached, apply a dot of glue to hold it in place. A little tip... before beginning to roll, tear the far end of the strip. A torn end will blend better than a sharp cut so your coil will appear perfectly round. I find that a straight pin or paper piercing tool works well to apply glue when I'm making coils. There are also fine-tipped, refillable glue bottles that many quillers like to use.
Licia added a silvery glint by gluing a metallic-edged quilling strip around each tight coil. Her heart frame also has some metallic strips mixed in with colored strips.
Completely assemble the heart on a non-stick surface and then place it on a journal, card, or mat board after spreading a thin layer of glue on the back.
Quilling and paper craft supplies I recommend can be found in my Amazon shop.
All Things Paper is an Amazon Associate.


