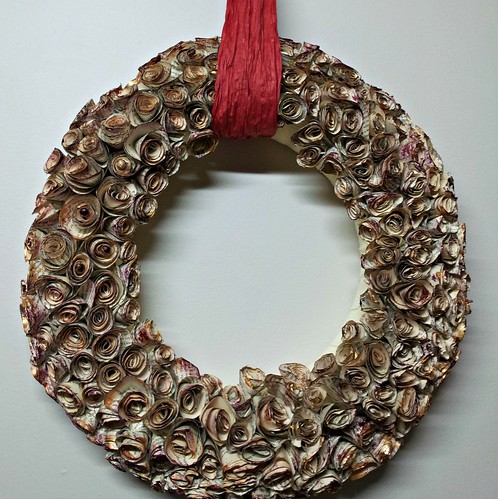
Spiral Rose Book Page Wreath Tutorial
Recently Licia Politis showed us how to make a rolled book page wreath with paper cones. Today she's back with a pretty spiral rose wreath. Fair warning... this one will take more time to make, but hey, it's mindless work. Put on a movie and get rolling!
Supplies:
Styrofoam wreath - size of choice; Licia's is 14 inches (36 cm) in diameter with a flat back
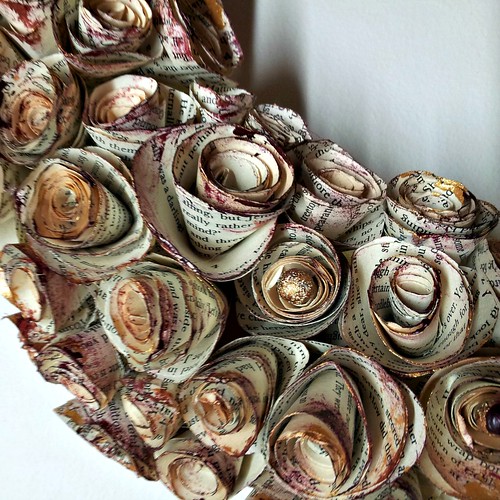
Fabric - subdued color; will mostly be covered by roses
Old book pages - Licia likes to use paperback books because the pages tear out easily and the paper is a nice weight for rolling
Wide ribbon - at least 20 inches in length (1/2 meter), more if you want a full bow with tails
Straight pins
Hot glue gun
Scissors
Bamboo skewer
Compass - optional
Silver, gold, or any color paint / paintbrush - optional
Round beads - optional
Quilling and paper craft supplies I recommend can be found in my Amazon shop.
Instructions:
1. Because hot glue dissolves Styrofoam, you'll need to protect the wreath by pinning or gluing on a layer of fabric. The fabric also looks nicer than the plain wreath form if there are any gaps between the roses.
2. Stack three book pages, fold them in half without making a sharp crease, and cut a 4 inch (10 cm) diameter semi-circle. This is a time saving technique, plus the irregularity that comes from cutting by hand makes the rose look more natural. If you prefer to use a compass, draw a circle on the top sheet of a stack of unfolded pages, keep the stack intact, and cut out the circle.
3. Hold the three circles stacked together and make a spiral cut from the outer edge all the way to the center. Need more clarification? Emily at Jones Design Company shows how she makes spiral roses.
4. To make a rose, begin rolling the outermost end of the spiral snugly around the skewer (or just use your fingers). Continue rolling the entire length of the strip, gradually loosening tension while rolling. Slip the rolled spiral off the skewer, let it relax a little if it's too tight, and glue the end underneath. Make as many as needed (a lot! 200 or so) to fully cover the wreath.
5. Glue the roses to the front and sides of the wreath.
6. Optional: Dry brush paint on the rose edges and/or glue beads to the center of all or some of the roses.
7. Loop ribbon through the top of the wreath and tie a hanging bow.
Thanks for sharing your tips, Licia!


