Simple Quilled Flower Card Tutorial - Quilling Basics
If you've been thinking you might like to give paper quilling a try, but haven't known where to start, this basic quilling tutorial is for you!
Trust me, quilling is really quite easy and relaxing to do once you learn a few tips. People are sometimes reluctant to try, thinking that working with narrow strips of paper would have to be super-complicated. Not true at all - it's just a matter of rolling coils and then pinching them to create a variety of interesting shapes.
Trust me, quilling is really quite easy and relaxing to do once you learn a few tips. People are sometimes reluctant to try, thinking that working with narrow strips of paper would have to be super-complicated. Not true at all - it's just a matter of rolling coils and then pinching them to create a variety of interesting shapes.
So are you with me? I hope so! Let's get started:
Card blank - use a purchased card or make your own by folding a 9 inch x 6 inch piece of card stock in half to make a card that measures 4.5 x 6. You'll get a very good result by using a bone folder to score the fold line and burnish a sharp crease, but your thumbnail will do a fine job too.
Note: The card is made with a pearlized rose duotone cardstock; the two colors add interest the way the circles are folded back to reveal the second shade. Obtain a similar effect by using any two-sided paper - patterned scrapbook paper would be great, for example. Just cut the circles and use a glue stick or double-stick tape to glue the paper to a card made of plain card stock.
Quilling paper
rose - 1/8 inch width
silver-edge ivory - 1/8 inch width, online suppliers such as Quilled Creations sell metallic-edge paper or silver your own with a Krylon leafing pen. Pressing a rolled coil into a silver stamp pad also works.
Quilling tool - either a needle tool or slotted tool - more about this choice later
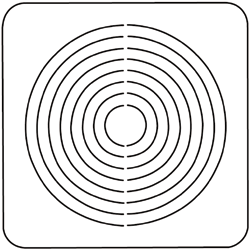
Circle template - a Coluzzle template would be ideal, but alas, they've been discontinued, put to rest by the many die cutting systems on the market.

If you don't happen to have one in your crafty stash, create the same effect by doing things the old fashioned way... use four round objects of descending sizes - measuring cups, for example - and a craft knife to cut halfway around each one to create two circles. Fold each circle back on itself to create the layered effect.
Glue - any kind that's suitable for paper
Scissors - detail
Ruler
Tweezers
Paper piercing tool or T pin - to apply glue
Glass head pins
Plastic lid - to use as a glue palette
Non-stick workboard - cork or Styrofoam - something into which you can stick pins
Damp cloth - to keep fingers free of glue
That's it; very few supplies and all are inexpensive. Nice!
Additional paper craft products I recommend can be found in my Amazon shop.
Choose a quilling tool: there are two types - a slotted tool or a needle tool

The needle tool is a bit tricky to learn to use, but the payoff is a coil with no center crimp. The slotted tool is a cinch, but the end result is a little tab in the center of each coil - this is no problem as long as you ignore quilling purists who frown on the crimp. Ahem... I know this because I used to be a purist. I've since made crimp-peace by using an ultra-fine slotted tool; my fingers thank me and the crimp is so tiny it's barely noticeable.
Practice a bit first; you'll soon be used to the amount of tension needed to roll even coils. Cut 1/8 inch wide strips of computer paper with a paper trimmer to use for practice. If 1/8 inch sounds scary, keep in mind that some quillers prefer to work with 1/16 strips or even narrower - not kidding!
To roll a coil with a needle tool: dampen fingertips and curve one end of a paper strip across the needle. Use the thumb and index finger of whichever hand is most comfortable to roll the paper around the needle. Use even pressure and be sure to roll the paper, not the tool.
 |
| quilling needle tool |
When the end of the strip is reached, allow the coil to relax, slide it off the tool, and glue the end. The relaxed roll is called a loose coil.

To roll a coil with a slotted tool: slide the strip end into the slot; turn the tool with one hand while evenly guiding the strip with the other hand.
How easy is that?! Complete the coil the same as with the needle tool.
 |
| quilling slotted tool |
Make the quilled flower:
teardrop (petal) - rose, 7 inches (make 11)
loose coil (flower center) - silver-gilded ivory, 7 inches (make 1)
shaped teardrop (leaf) - silver-gilded ivory, 9 inches (make 2)
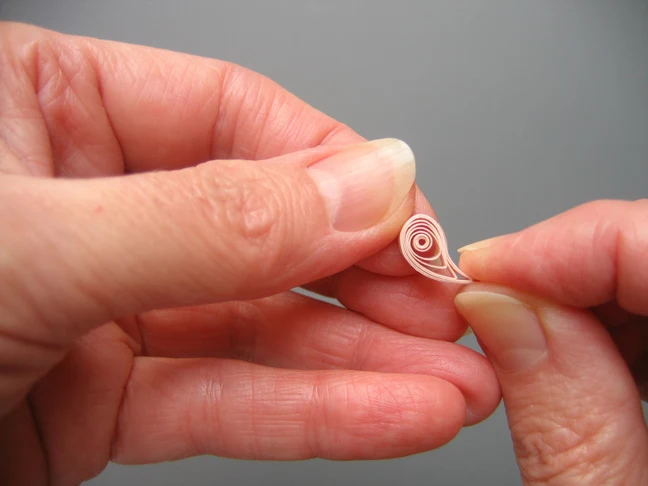
To make a teardrop (petal), pinch the join spot of a round, loose coil to make a sharp point.

To make a shaped teardrop, curve point gently.

Assemble the flower on a workboard; my favorite is a Styrofoam meat tray from the grocery store. Put a dab of glue on a plastic lid and then dip into it with the tip of a paper piercing tool or a T pin; this gives just the right amount of control. The main thing is to not use too much glue; none should show on your finished project.
Start the flower shape by gluing the pointed end of a petal to the side edge of the flower center. For ease, use tweezers to handle the small parts. Continue gluing petals evenly around the center. Before the glue hardens, prop several of the petals up on pin heads. Leave in position until dry; this will give a natural look to the flower. Add a shaped teardrop to each side of the flower, gluing the rounded ends under a couple of the petals that are raised.
Hold the finished flower with tweezers and dip the underside in glue; place on card.
Step back to admire your masterpiece!
All Things Paper is an Amazon affiliate.
Papercraft supplies and books I recommend can be found in my Amazon shop.


